
How to handle an unsupported format or damaged file in Adobe Premiere Pro?
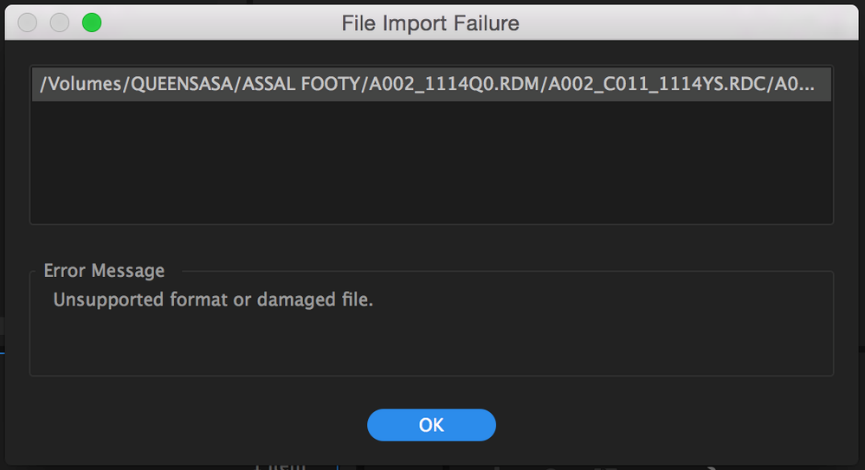
Ready to tackle unsupported formats or damaged files in Premiere Pro?
Don’t let file issues slow you down – give it a shot.
This can happen due to various reasons such as using a codec that Premiere Pro doesn’t recognize or having a codec that is not installed on your system.
To troubleshoot this issue, you can try the following steps:

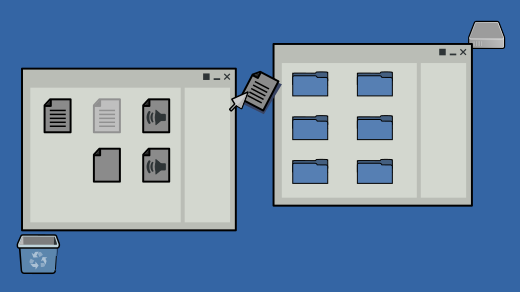
1. Changing the file location
Sometimes, the issue may stem from the file path or directory where the footage is stored. By relocating the files to a different folder or drive, you may circumvent any potential issues related to the file path or directory structure.
Here’s how you can do it:
a) Locate the Files: Identify the footage files that you’re unable to import into Premiere Pro.
b) Create a New Folder: Create a new folder in a different location on your computer or external drive. Ensure that the new location has sufficient storage space and is easily accessible.
c) Move the Files: Copy or move the footage files from their current location to the newly created folder.
d) Import into Premiere Pro: Open Premiere Pro and attempt to import the footage again. Navigate to the new location where you moved the files and select them for import.
e) Check for Errors: If the files import successfully, you’ve likely resolved the issue. However, if you encounter the same error, the problem may lie elsewhere, such as with the file format itself or potential file corruption.
By changing the file location, you’re essentially refreshing the file path and directory structure, which can sometimes resolve issues related to unsupported formats or damaged files. If the problem persists after attempting this solution, you may need to explore other troubleshooting steps, such as verifying file formats, updating Premiere Pro, or checking for file corruption.
2. Changing the file name extension
Another solution to try when encountering issues with unsupported formats or damaged files in Premiere Pro.

Here’s how you can do it:
a) Open File Explorer: Navigate to the folder where the problematic file is located using File Explorer on Windows.
b) Show File Extensions: Click on the “View” tab in the menu bar and then select “File name extensions.” This will ensure that file extensions are visible in the file names.
c) Identify the File: Locate the file you’re having trouble importing into Premiere Pro.
d) Rename the File: Right-click on the file and select “Rename.” Then, change the file name extension to a different format that Premiere Pro supports. For example, if the original extension is “.mp4” and you’re having trouble importing it, you can try renaming it to “.mts” or another supported format.
e) Try Importing Again: After renaming the file, try importing it into Premiere Pro again. If the issue was related to the file extension or format compatibility, this may resolve the problem.
f) For Images: If you’re having trouble importing an image file (e.g., .jpeg), you can try changing the file extension to a different image format that Premiere Pro supports, such as .png or .psd.
Changing the file name extension essentially alters the file type designation, potentially making it recognizable to Premiere Pro. However, be cautious when changing file extensions, as it may not always work and could potentially corrupt the file if done incorrectly. If changing the file extension doesn’t resolve the issue, further troubleshooting or alternative solutions may be necessary.

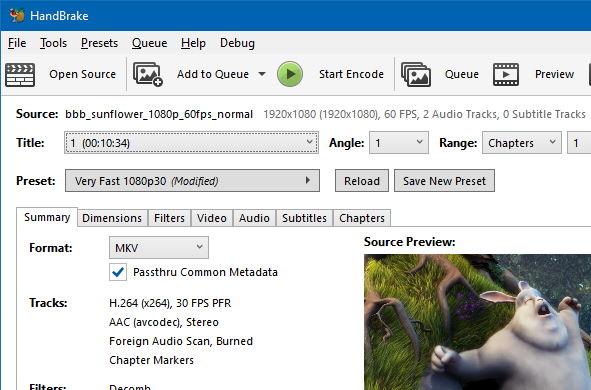
2.1 HandBrake
Using HandBrake to convert files to a compatible format like .mp4 is another effective solution if the previous methods fail to resolve the issue with unsupported formats or damaged files in Premiere Pro.
Here’s how you can use HandBrake for file conversion:
a) Download and Install HandBrake: Start by downloading and installing HandBrake from the official website (https://handbrake.fr/).
Follow the installation instructions provided.
b) Open HandBrake: Launch the HandBrake application on your computer.
c) Select Source File: Click on the “Open Source” button in HandBrake to select the file you want to convert. Navigate to the location of the problematic file and select it.
d) Choose Output Settings: In the “Output Settings” section, specify the destination folder where you want the converted file to be saved. Then, choose the output format as .mp4 or another format compatible with Premiere Pro.
e) Adjust Settings (Optional): HandBrake offers various advanced settings for video and audio encoding. You can adjust these settings according to your preferences, but for basic conversion, the default settings should suffice.
f) Start Conversion: Once you’ve configured the settings, click on the “Start Encode” button to begin the conversion process. HandBrake will convert the file to the specified format.
g) Import into Premiere Pro: After the conversion is complete, navigate to the destination folder where the converted file is saved. Then, import the converted file into Premiere Pro as you normally would.
By using HandBrake to convert files to a compatible format like .mp4, you ensure that remiere Pro can recognize and import the footage without any issues. This method is particularly useful when dealing with files that have unusual codecs or formats that Premiere Pro doesn’t support natively.
Did this assistance help resolve your issue effectively?
Share your feedback with us!
Your input matters and helps us improve our support.

David Grégoire
David (AKA Monsieur eCommerce) est un multi-entrepreneur. Il dédie 90% de son temps à développer SousTitreur.com - une startup qu'il a « bootstraped » et qui est dédié à un succès international.